Tutorial - ASP.NET MVC
To work with these sample projects you will need CodeTrigger installed, Visual Studio
2010-2015, and a test database with some data.
Follow these steps below to demonstrate building a sample asp.net MVC(5) app using CodeTrigger
This guide is somewhat out of date, although still workable. For an up-to-date guide on CodeTrigger Integrated MVC support in version 4.8.6.2 (released 15th June 2016), go to
https://rapidcodeframeworks.com/2016/06/15/database-to-full-asp-net-mvc-app-in-5-minutes/
and for an up-to-date version of the guide that builds a unit-test enabled app using the repository pattern, see
https://rapidcodeframeworks.com/2016/06/29/database-to-testable-webapi-mvc-app-in-15-mins//
|
|
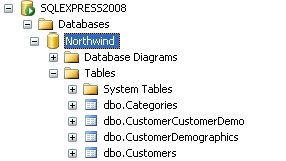
Microsoft Northwind Sample db
|
Step 1 - Ensure you have a relevant test database
The CodeTrigger sample applications are designed to work with your existing database
schema to ensure that the samples are as relevant as possible. Ensure that you have
a TEST SQL Server/Oracle/MYSQL database handy. CodeTrigger and its associated supplier
companies do not accept any liability for data loss whilst using the CodeTrigger
product. It is important that you use a test database until you are familiar with
the functionality of the generated code.
|
|
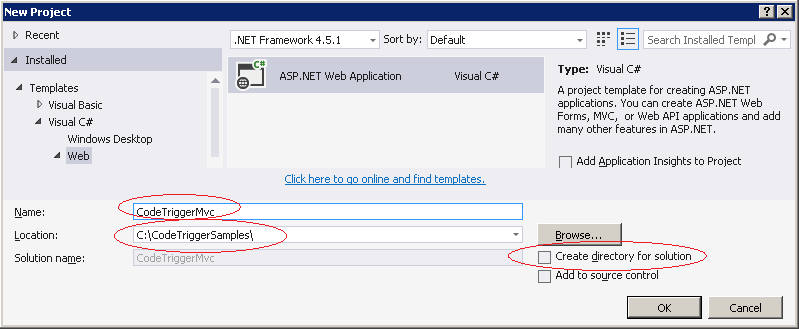
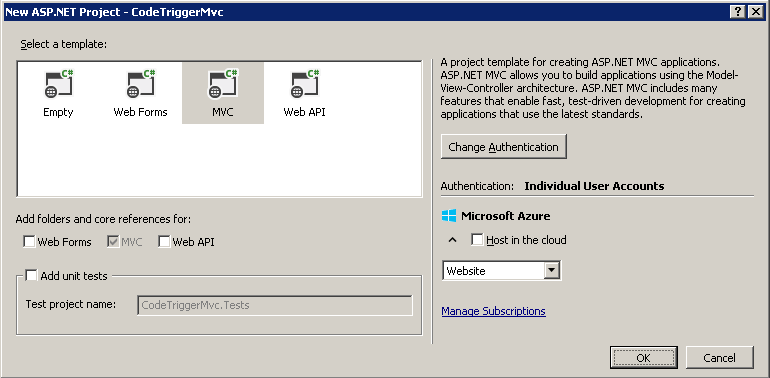
Step 2 - Create an MVC5 project in Visual Studio
In Visual Studio's New Project Wizard, name your new MVC5 project as follows
Project name: CodeTriggerMvc
Location: C:\CodeTriggerSamples
Make sure the 'Create directory for solution' option is unticked
|
|
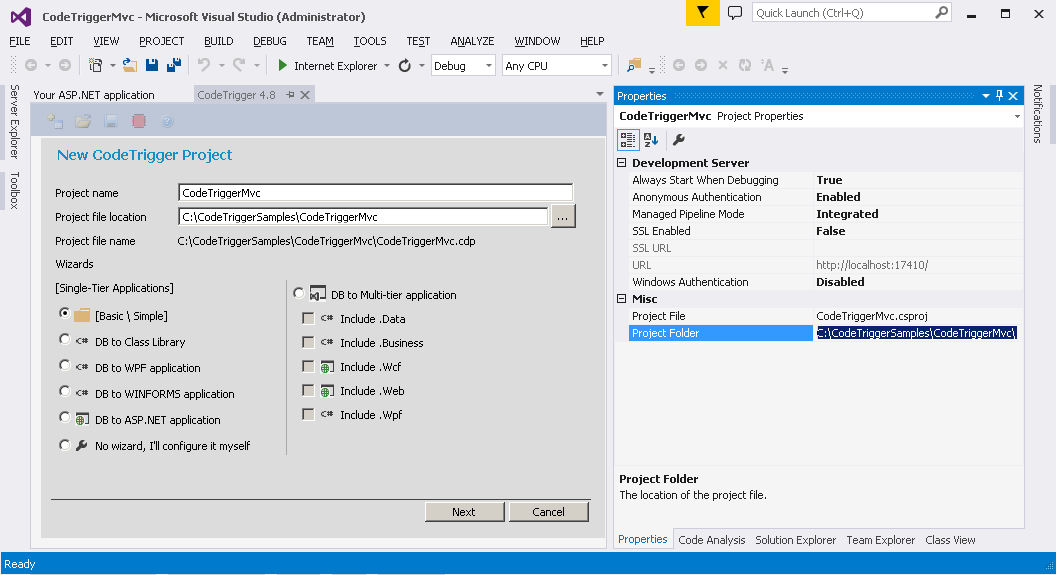
Step 3 - Create a basic CodeTrigger project using the wizard
Open CodeTrigger (from the Tools menu if using the Visual Studio Add-in), Click on the New Project icon in its embedded toolbar, and ensure the '[Basic\Simple]' wizard is selected.
Use the following settings for the project name and location:
Project name: CodeTriggerMvc
Location: C:\CodeTriggerSamples\CodeTriggerMvc\
For the purposes of this demo, the project name should be identical to your visual studio project name, ie 'CodeTriggerMvc'
The project location should be pointing to the folder where the code for the CodeTriggerMvc project would normally go, as shown in the picture below.
It is important to get the name and location exactly right, or the files generated by this wizard might not be in the right place, or might not get added to the project automatically.
Click Next to move to the next step.
|
|
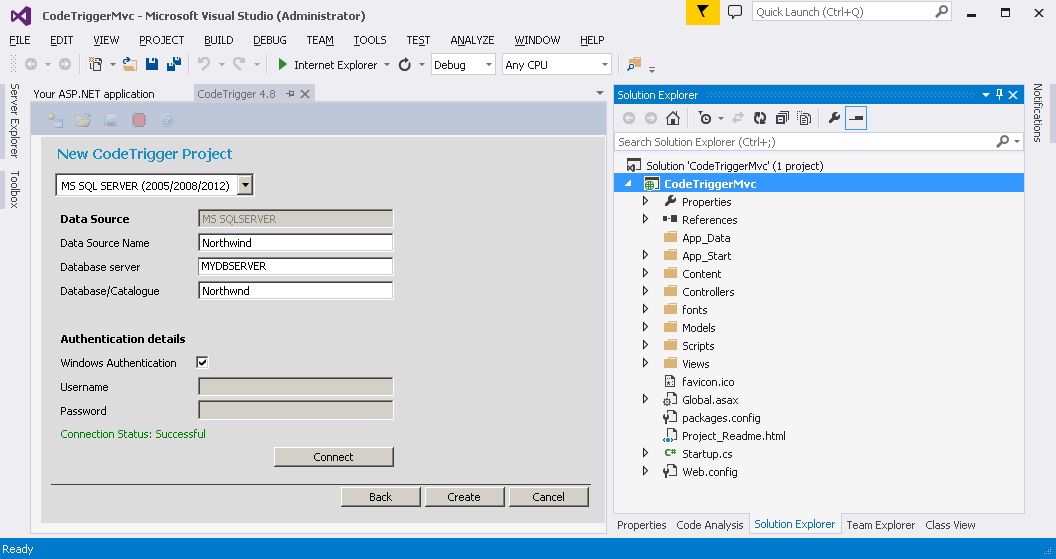
Step 4 - Select data source and create domain folders
Enter the details of your datasource, click 'Connect' to verify that you can connect successfully to the datasource, then click 'Create'.
In your Visual Studio project, create a 'BusinessObjects' folder and a 'DataObjects' folders.
In the CodeTrigger Menu strip, select the 'Data Sources' tab.
In the 'Business Layer Conventions' section, amend the Project Folder to 'C:\CodeTriggerSamples\CodeTriggerMvc\BusinessObjects'
In the 'Data Layer Conventions' section, amend the Output File Path to 'C:\CodeTriggerSamples\CodeTriggerMvc\DataObjects'
These folder paths should match the newly created BusinessObjects and DataObjects folders.
|
|
Step 5 - Select schema objects
Click on the Schema Objects tab. Here you select the specific database entity (dbo.Customers) that you would like to generate access code for, ie select one or more tables from the list that CodeTrigger has found in the database.
(For Oracle Users, If the 'Connect' button connects successfully but you have an empty list in the Schema Objects tab, this might be because you have entered an incorrectly named 'Schema' in the field provided, and CodeTrigger is unable to find any entities relating to that schema).
Having selected your schema object(s) from the list provided, select the 'Business Objects' tab and select the relevant Business Object(s)
|
|
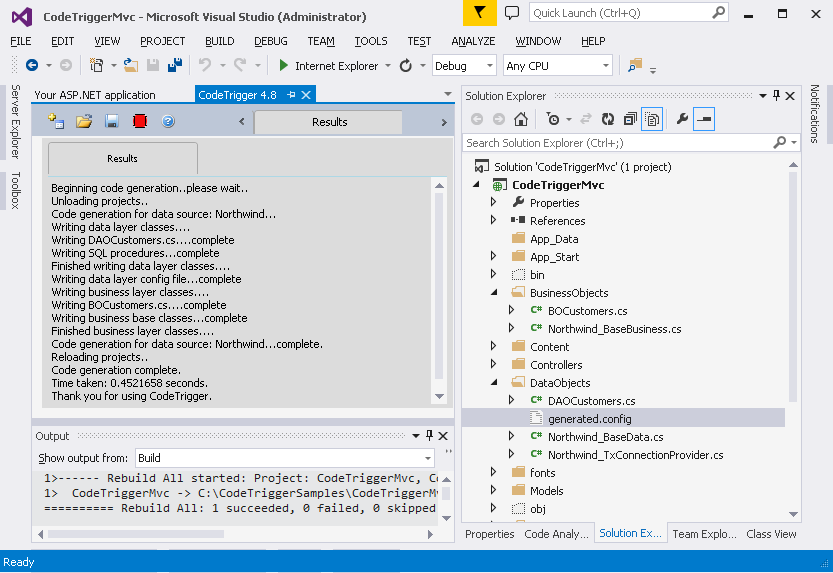
Step 6 - shoot!
Click the 'Generate Code' icon on the embedded toolbar.
Thats it. CodeTrigger generates all the code you need for the business layer and data access layer. If you cannot see the generated code, select 'Show all files' in your Visual Studio solution explorer, or refresh its contents. You might need to manually include the files in your project.
|
|
Step 7 - Configure connection string.
One of the files generated in the project folder will be a 'generated.config' file. (You might need to select 'Show all files' in your solution folder to see it as it doesnt get included in the project.)
Open the 'generated.config' file and copy the appsettings section containing the dataconnection string into appSettings section of the Web.config file in your project.


Build the Visual Studio project
|
|
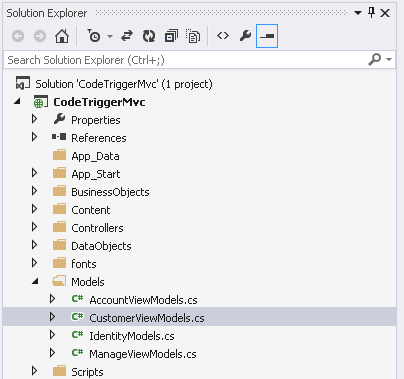
Step 8 - Create your ViewModel class.
Create a new class in the 'Models' folder of your MVC project, called 'CustomerViewModels' with the following code
using System;
using System.Collections.Generic;
using System.Linq;
using System.Web;
namespace CodeTriggerMvc.Models
{
    public class CustomerViewModel
    {
        public CustomerViewModel() { }

        public CustomerViewModel(BOCustomers cust)
        {
            CustomerID = cust.CustomerID;
            CompanyName = cust.CompanyName;
            ContactName = cust.ContactName;
            ContactTitle = cust.ContactTitle;
            Address = cust.Address;
        }

        #region member properties
        public string CustomerID {get; set;}
        public string CompanyName {get; set;}
        public string ContactName { get; set;}
        public string ContactTitle { get; set;}
        public string Address {get; set;}
        #endregion
    }
}
|
|
|
|
Step 9 - Create your Views.
Create a sub folder in your project's 'View' folder called 'Customer'
Right-click the new View\Customer folder and add Create, Delete, Details, Edit, and Index views, selecting the CustomerViewModel as the Model class from the dropdown as shown. (For the Index view, use the 'List' template)
Leave the 'Data Context Class', 'Create as partial view', and 'Use a layout page' options unticked/blank.
|
|
Step 10 - Ensure the correct primary keys.
Update the views to ensure you have the correct primary key fields identified in your Details.cshtml and Index.cshtml views
Details.cshtml

Index.cshtml

|
|
Step 11 - Create the Controller class.
Right-click on the 'Controllers' folder in your project and select Add->Controller->MVC5 Controller - Empty
Name the controller class 'CustomerController'. Edit the generated class to contain the following code (copy and paste it over the generated code if necessary)
using System;
using System.Collections.Generic;
using System.Linq;
using System.Web;
using System.Web.Mvc;
using System.Net;
using CodeTriggerMvc.Models;

namespace CodeTriggerMvc.Controllers
{
    public class CustomerController : Controller
    {
        public ActionResult Index()
        {
            IList<BOCustomers> custsBO = BOCustomers.CustomersCollection();
            IList<CustomerViewModel> custsVM = new List<CustomerViewModel>();
            foreach (BOCustomers custBO in custsBO)
                custsVM.Add(new CustomerViewModel(custBO));
            return View(custsVM);
        }

        public ActionResult Details(string id)
        {
            if (id == null) { return new HttpStatusCodeResult(HttpStatusCode.BadRequest); }
            IList<BOCustomers> custsBO = GetCustomersById(id);
            if (custsBO.Count < 1)  return HttpNotFound();
            return View(new CustomerViewModel(custsBO[0]));
        }

        public ActionResult Create()
        {   return View();  }

        [HttpPost]
        [ValidateAntiForgeryToken]
        public ActionResult Create([Bind(Include = "CustomerID,CompanyName,ContactName,ContactTitle,Address")]
                        CustomerViewModel customer)
        {
            if (ModelState.IsValid)
            {
                BOCustomers boCust = new BOCustomers();
                boCust.CustomerID = customer.CustomerID;
                boCust.CompanyName = customer.CompanyName;
                boCust.ContactName = customer.ContactName;
                boCust.ContactTitle = customer.ContactTitle;
                boCust.Address = customer.Address;
                boCust.SaveNew();
                return RedirectToAction("Index");
            }
            return View(customer);
        }

        public ActionResult Edit(string id)
        {
            if (id == null) { return new HttpStatusCodeResult(HttpStatusCode.BadRequest); }
            IList<BOCustomers> custsBO = GetCustomersById(id);
            if (custsBO.Count < 1) return HttpNotFound();
            return View(new CustomerViewModel(custsBO[0]));
        }

        [HttpPost]
        [ValidateAntiForgeryToken]
        public ActionResult Edit([Bind(Include = "CustomerID,CompanyName,ContactName,ContactTitle,Address")]
                        CustomerViewModel customer)
        {
            if (ModelState.IsValid)
            {
                if (customer.CustomerID == null) { return new HttpStatusCodeResult(HttpStatusCode.BadRequest); }
                IList<BOCustomers> custsBO = GetCustomersById(customer.CustomerID);
                BOCustomers custBO = custsBO[0];
                custBO.ContactName = customer.ContactName;
                custBO.ContactTitle = customer.ContactTitle;
                custBO.CompanyName = customer.CompanyName;
                custBO.Address = customer.Address;
                custBO.Update();
                return RedirectToAction("Index");
            }
            return View(customer);
        }

        public ActionResult Delete(string id)
        {
            if (id == null) { return new HttpStatusCodeResult(HttpStatusCode.BadRequest); }
            IList<BOCustomers> custsBO = GetCustomersById(id);
            if (custsBO.Count < 1) return HttpNotFound();
            return View(new CustomerViewModel(custsBO[0]));
        }

        [HttpPost, ActionName("Delete")]
        [ValidateAntiForgeryToken]
        public ActionResult DeleteConfirmed(string id)
        {
            IList<BOCustomers> custsBO = GetCustomersById(id);
            custsBO[0].Delete();
            return RedirectToAction("Index");
        }

        private IList<BOCustomers> GetCustomersById(string id)
        {
            BOCustomers searchBO = new BOCustomers() { CustomerID = id };
            return BOCustomers.CustomersCollectionFromSearchFields(searchBO);
        }
    }
}
|
|
Step 12 - Thats it! Build and run.
Hit F5 to run, navigate to the relevant url eg http://localhost:mydevportnumber/customer and list/update/edit/delete your customer entries in your ASP.NET MVC app.
|