Tutorial - Basic/Simple scenario [inserting database access code into a console project]
To work with these sample projects you will need CodeTrigger installed, Visual Studio
2010-2015, and a test database with some data.
Follow these steps below to demonstrate a very basic/simple scenario using CodeTrigger with your existing project
This guide has been updated for version 4.8.2.1 (released March 31st 2015).
|
|
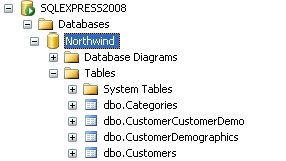
Microsoft Northwind Sample db
|
Step 1 - Ensure you have a relevant test database
The CodeTrigger sample applications are designed to work with your existing database
schema to ensure that the samples are as relevant as possible. Ensure that you have
a TEST SQL Server/Oracle/MYSQL database handy. CodeTrigger and its associated supplier
companies do not accept any liability for data loss whilst using the CodeTrigger
product. It is important that you use a test database until you are familiar with
the functionality of the generated code.
|
|
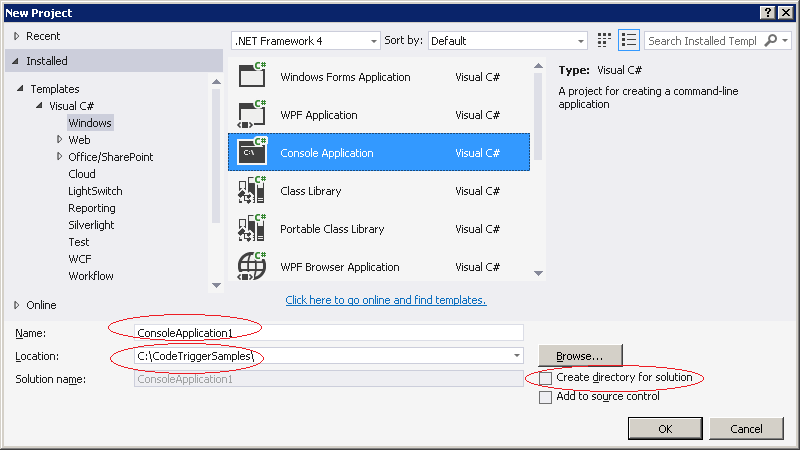
Step 2 - Create a Console project in Visual Studio
In Visual Studio's New Project Wizard, name your new Console project as follows
Project name: ConsoleApplication1
Location: C:\CodeTriggerSamples
Make sure the 'Create directory for solution' option is unticked
|
|
Step 3 - Create a basic CodeTrigger project using the wizard
Open CodeTrigger (from the Tools menu if using the Visual Studio Add-in), Click on the New Project icon in its embedded toolbar, and ensure the '[Basic\Simple]' wizard is selected.
Use the following settings for the project name and location:
Project name: ConsoleApplication1
Location: C:\CodeTriggerSamples\ConsoleApplication1\
For the purposes of this demo, the project name should be identical to your visual studio project name, ie 'ConsoleApplication1'
The project location should be pointing to the folder where the code for the ConsoleApplication1 project would normally go, as shown in the picture below.
It is important to get the name and location exactly right, or the files generated by this wizard might not be in the right place, or might not get added to the project automatically.
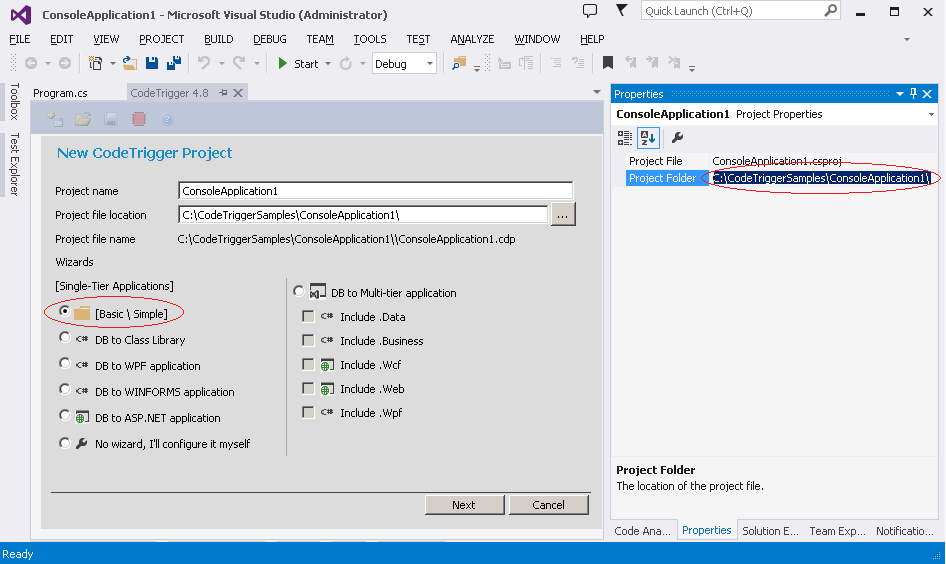 Click Next to move to the next step.
|
|
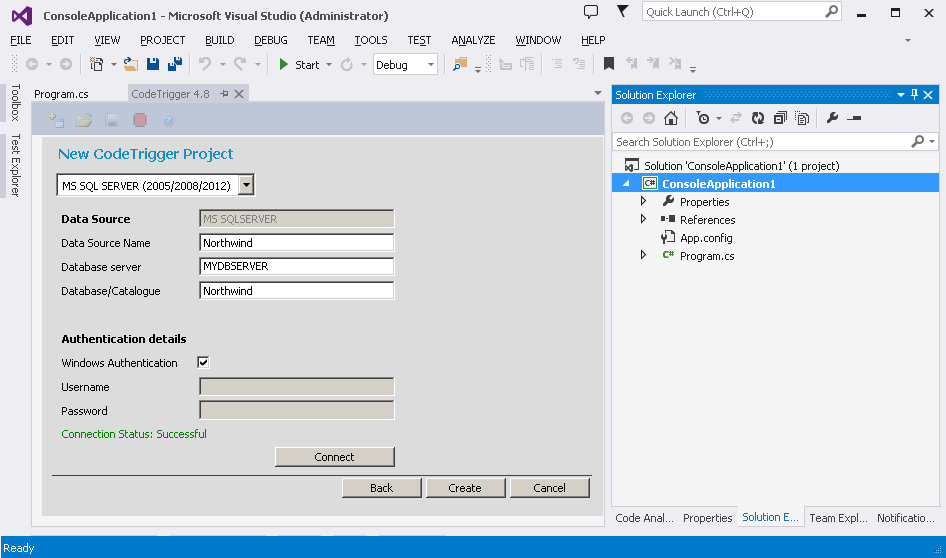
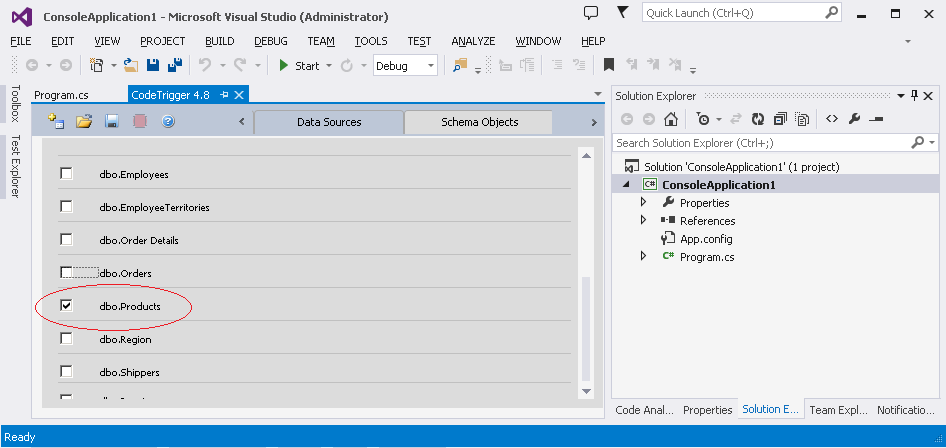
Step 4 - Select data source and schema objects
Enter the details of your datasource, click 'Connect' to verify that you can connect successfully to the datasource, then click 'Create'.
This takes you to the Schema Objects tab. Here you select the specific database entity that you would like to generate access code for, ie select one or more tables from the list that CodeTrigger has found in the database.
(For Oracle Users, If the 'Connect' button connects successfully but you have an empty list in the Schema Objects tab, this might be because you have entered an incorrectly named 'Schema' in the field provided, and CodeTrigger is unable to find any entities relating to that schema).
Having selected 1 or 2 schema objects from the list provided, select the 'Data Objects & Operations' tab
|
|
Step 5 - Select required operations and shoot!
For the purposes of this tutorial we will not be generating any Business objects so ensure that none of the items in the Business Objects tab are selected.
In the 'Data Objects & Operations' tab, drop down the data object you are interested in, select the candidate operations you are interested in, and click the 'Generate Code' icon on the embedded toolbar.
(Note that clicking 'Generate Code' will overwrite any previous code you generated for that particular dataobject, so tick all the database ops you need.)
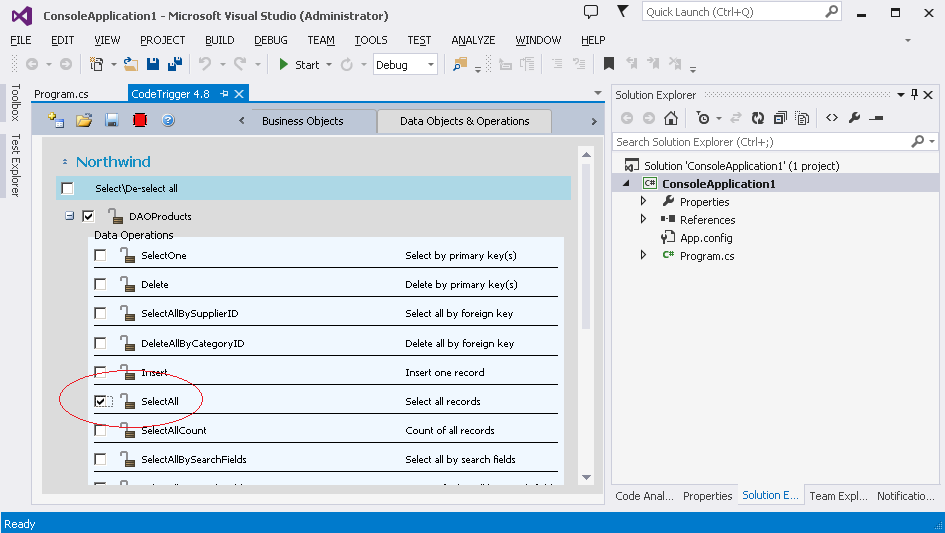
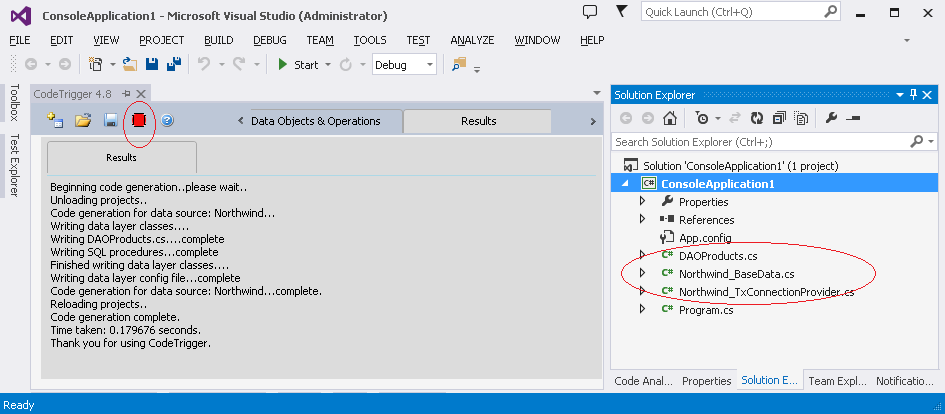
Thats it. CodeTrigger generates all the code you need for the data access layer. If you cannot see the generated code, select 'Show all files' in your Visual Studio solution explorer, or refresh its contents. You might need to manually include the files in your project.
|
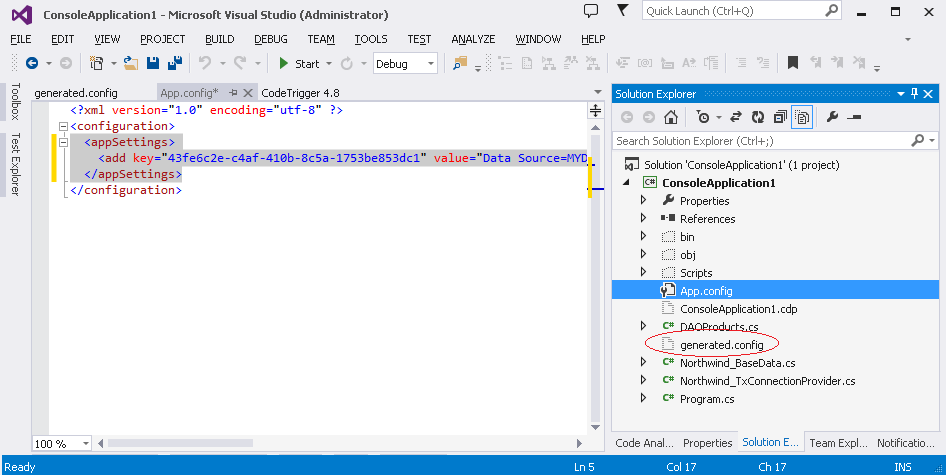
Step 6 - Configure, Build & Run.
One of the files generated in the project folder will be a 'generated.config' file. (You might need to select 'Show all files' in your solution folder to see it as it doesnt get included in the project.)
Open the 'generated.config' file and copy the appsettings section containing the dataconnection string into the App.config file in your project.
(If your project doesnt yet have an App.config file, create one from your solution folder using 'Add->New Item' context menu, and selecting 'General\Application Configuration File')
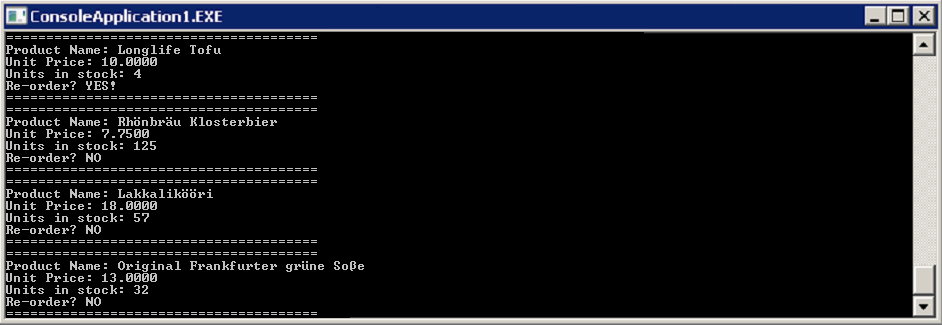
Finally, write some code to output to screen!
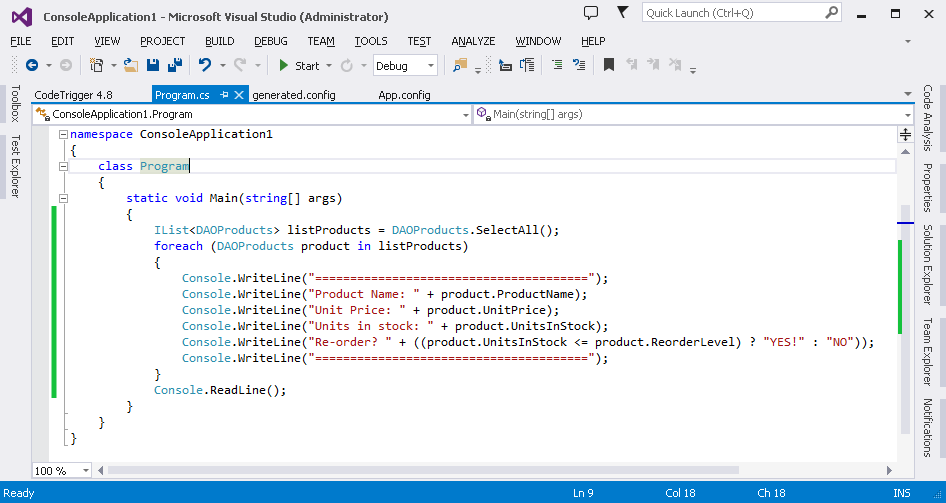
In Visual Studio, build and run!
|
|
Example Client Code #2 - Updating the data
    static void DiscontinueProduct(int productId, bool discontinued)
    {
        DAOProducts product = DAOProducts.SelectOne(productId);
        Northwind_TxConnectionProvider conn = new Northwind_TxConnectionProvider();
        conn.OpenConnection();

        product.ConnectionProvider = conn;
        conn.BeginTransaction("");
        try
        {
            product.Discontinued = discontinued;
            product.Update();
            conn.CommitTransaction();
        }
        catch { conn.RollbackTransaction(""); }
        finally { conn.CloseConnection(true); }
    }
|